
I. Overview
This guide details how to port the openvela system to the Espressif ESP32-S3-EYE development board, focusing on enabling its onboard Wi-Fi feature.
Target Audience: Engineers familiar with openvela and the embedded development workflow.
Final Goal: To successfully compile and flash a Wi-Fi-enabled openvela firmware to the ESP32-S3-EYE board and verify the network interface using the NuttShell (NSH) command line.
II. Prerequisites
To download the source code, see Quick Start.
III. Preparation: Set Up the ESP32-S3 Development Environment
You need to prepare a dedicated cross-compilation toolchain and flashing tool for the ESP32-S3 chip.
1. Install the ESP32-S3 Toolchain
-
Download the toolchain: Execute the following command to download the cross-compilation toolchain for the Xtensa architecture.
curl -L -O --progress-bar "https://github.com/espressif/crosstool-NG/releases/download/esp-12.2.0_20230208/xtensa-esp32s3-elf-12.2.0_20230208-x86_64-linux-gnu.tar.xz"
-
Extract the toolchain: Unzip the downloaded archive to your chosen installation directory (e.g., /opt).
tar -xf xtensa-esp32s3-elf-12.2.0_20230208-x86_64-linux-gnu.tar.xz -C /opt/ -
Configure environment variables: Add the toolchain's bin directory to your system's PATH environment variable so that the system can find the compiler.
export PATH="/opt/xtensa-esp32s3-elf/bin:$PATH"Note: To make this configuration permanent, add the above export command to your ~/.bashrc or ~/.zshrc file, and then run source ~/.bashrc.
-
Verify the installation: Run the following command. If the toolchain version is displayed correctly, the installation was successful.
xtensa-esp32s3-elf-gcc -v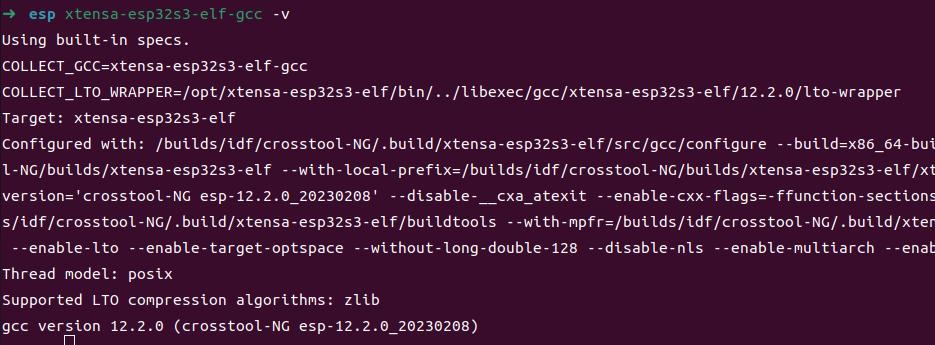
2. Install esptool
esptool is a key utility for flashing firmware to Espressif chips. We strongly recommend installing it in a Python virtual environment to avoid conflicts with other system-wide Python packages.
-
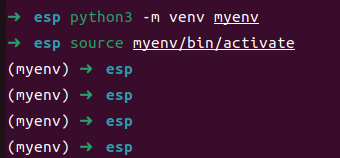
Create and activate the virtual environment:
apt install python3.10-venv

python3 -m venv myenv
source myenv/bin/activate
After successful activation, your command line prompt will be prefixed with (myenv).
-
Install esptool in the virtual environment:
pip install esptoolNote: All subsequent compilation and flashing operations should be performed within this activated (myenv) environment.

IV. Porting and Compilation
This section guides you through creating a board-specific configuration file and compiling the firmware.
1. Understand the esp32s3-eye Board-Level Code Structure
Before proceeding with the configuration, familiarize yourself with the Board Support Package (BSP) directory structure for the esp32s3-eye. This will help you understand the purpose of each file.
esp32s3-eye/
├── configs/                 # Board-level feature configuration center, containing defconfig files for various features
│   ├── gpio/
│   │      └── defconfig     # GPIO pin function mapping (e.g., buttons/LEDs/sensor control)
│   ├── i2c/
│   │      └── defconfig     # I2C bus parameters (rate/device address/interrupt configuration)
│   ├── lcd/
│   │      └── defconfig     # Display interface protocol (SPI/I2C), resolution, timing parameters
│   ├── nsh/
│   │      └── defconfig     # NuttShell (NSH) interactive environment configuration (serial terminal/startup script)
│   ├── usbhsh/
│   │       └── defconfig    # USB Host stack configuration (peripheral driver support)
│   └── wifi/
│           └── defconfig    # Wi-Fi/BLE wireless protocol parameters (SSID/encryption/RF calibration)
├── include/                 # Board-level Hardware Abstraction Layer (HAL) header files
│   └── board.h              # Defines memory layout, clock, peripheral base addresses, etc.
├── scripts/                 # Build system scripts
│   └── Make.defs            # Defines cross-compiler, compilation options, etc.
└── src/                     # Board-level driver source code and feature initialization code
    └── Kconfig              # Kconfig menu configuration items for menuconfig
2. Create a Custom Board-Level Configuration File
You need to create a separate set of board-level configurations for your project under the vendor directory.
-
Create the directory structure. Execute the following command to create the required directories. The -p flag ensures that parent directories are also created.
mkdir -p vendor/espressif/boards/esp32s3/esp32s3-eye/configs/openvela -
Add the Wi-Fi configuration file. In the newly created openvela directory, create a new file named defconfig. This file contains all the openvela configuration items required to enable the Wi-Fi feature.
-
Copy and paste the entire content from Appendix A: Wi-Fi Feature defconfig into the vendor/espressif/boards/esp32s3/esp32s3-eye/configs/openvela/defconfig file.
3. Run the Compilation
Now, use the build.sh script and specify the path to the defconfig we just created to compile openvela.
# Ensure you are still in the (myenv) virtual environment
rm nuttx/.config
rm nuttx/Make.defs

./build.sh vendor/espressif/boards/esp32s3/esp32s3-eye/configs/openvela/ -j8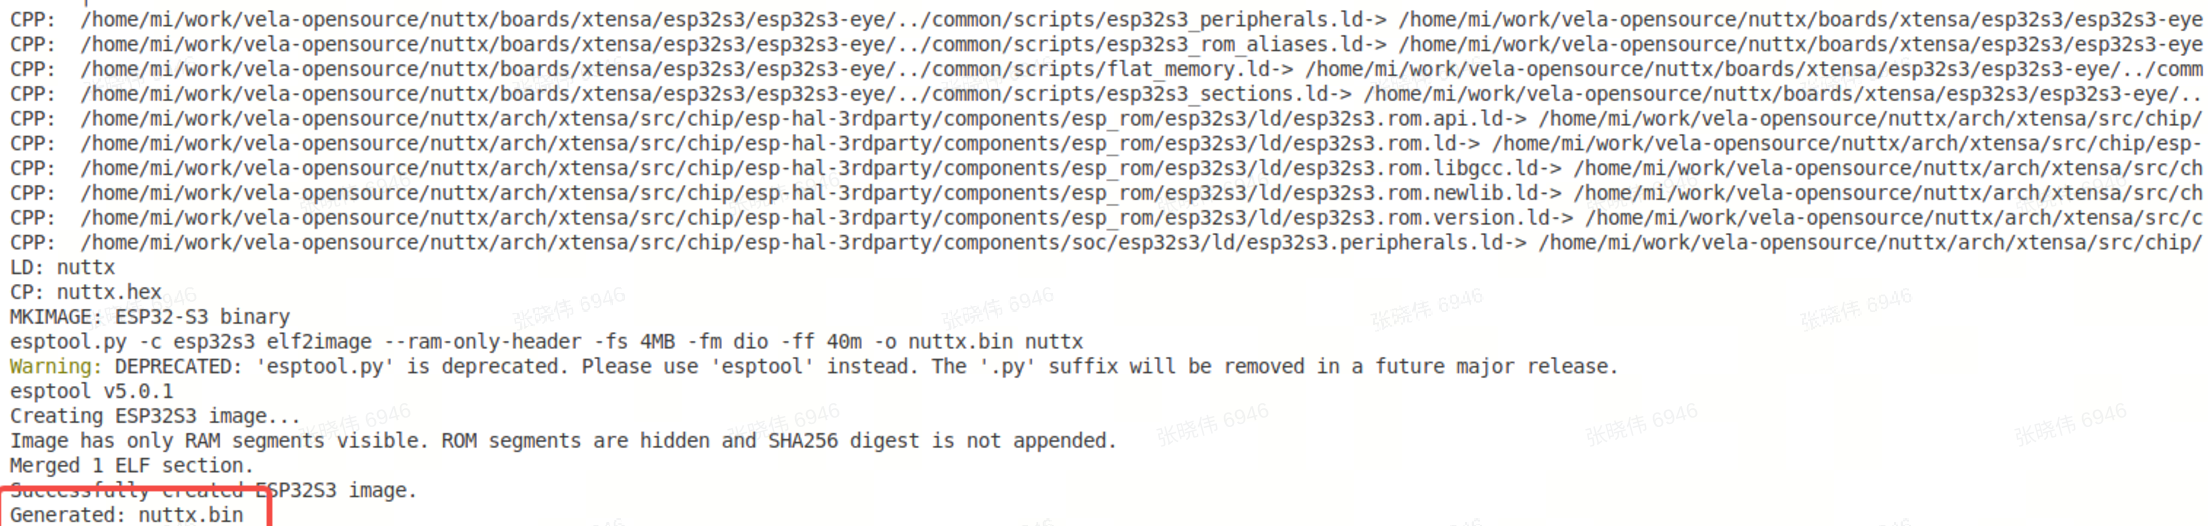
V. Flashing and Verification
After a successful compilation, flash the generated firmware to the development board and verify its functionality.
1. Flash the Firmware
-
Connect the development board:
Use a USB cable to connect the ESP32-S3-EYE board to your computer.
-
Identify the serial port device:
Run the ls /dev/ttyACM* or dmesg command to find the serial port device corresponding to the board, which is typically /dev/ttyACM0.
-
Execute the flash command:
In the nuttx directory, run the make flash command. Replace ESPTOOL_PORT with your actual serial port device.
# Ensure you are still in the (myenv) virtual environment
# Enter the nuttx source directory
cd nuttx

make -j$(nproc) flash ESPTOOL_PORT=/dev/ttyACM0 ESPTOOL_BINDIR=./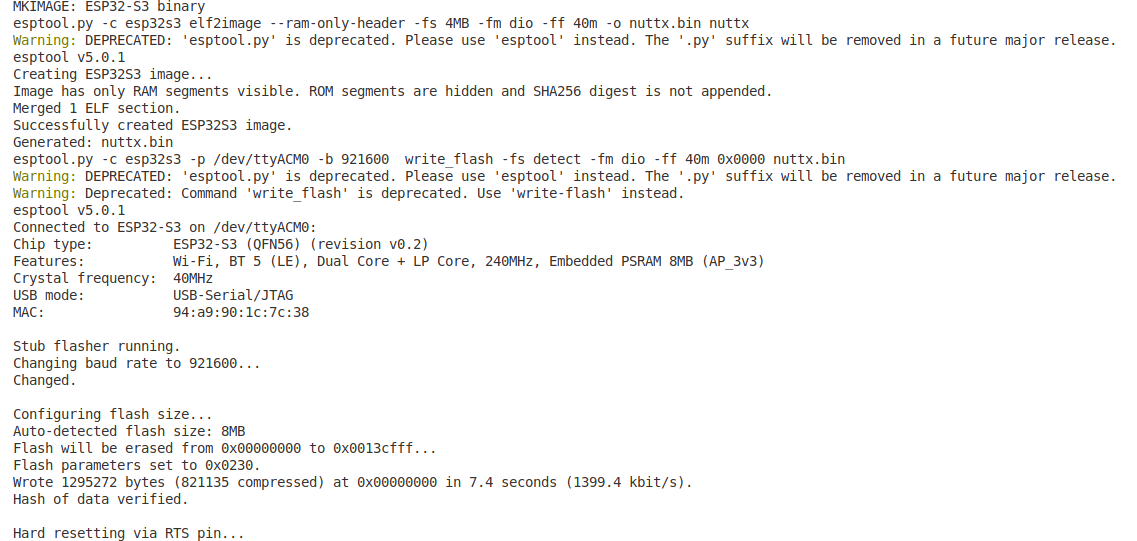
2. Verify the Wi-Fi Feature
-
Open a serial terminal: Use minicom or another serial terminal tool to connect to the board. The baud rate is typically 115200.
sudo minicom -D /dev/ttyACM0 -
Check the network interface: After the system boots, you will see the NSH command prompt nsh>. Type the ifconfig command and press Enter.
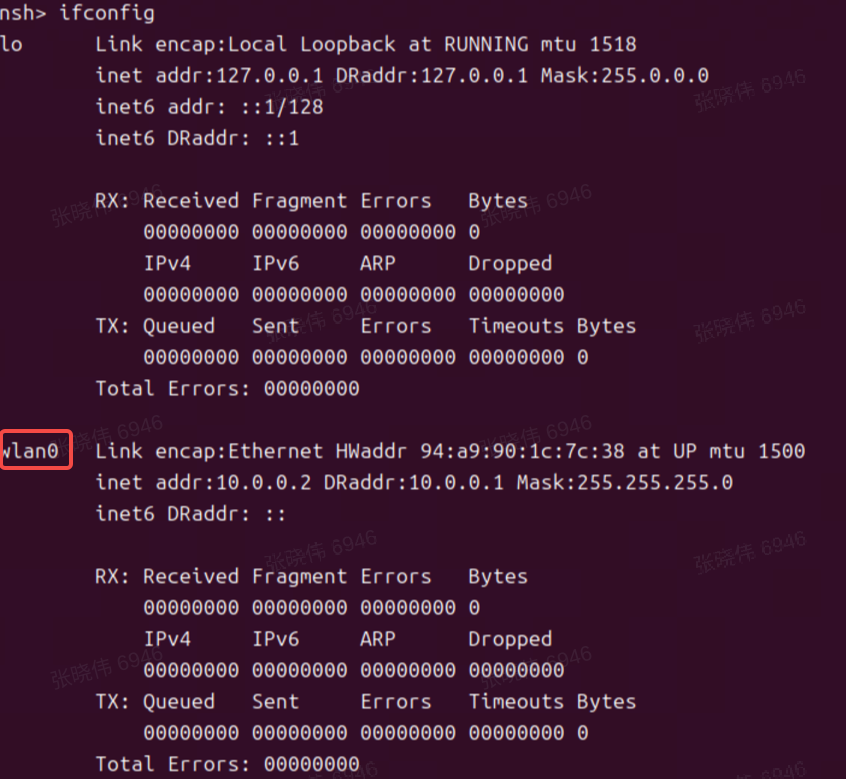
Verification Point: If you can see the wlan0 network interface in the output, as shown in the image above, it indicates that the Wi-Fi driver has loaded successfully and the porting is complete.
VI. Summary
This guide demonstrated how to port openvela to the ESP32-S3-EYE development board and enable its Wi-Fi feature by configuring the ESP32-S3 toolchain and creating/applying a custom defconfig file. The core tasks involve correctly setting up the build environment and providing a defconfig that includes the complete network stack and drivers.
VII. References
Appendix A: Wi-Fi Feature defconfig
#
# This file is autogenerated: PLEASE DO NOT EDIT IT.
#
# You can use "make menuconfig" to make any modifications to the installed .config file.
# You can then do "make savedefconfig" to generate a new defconfig file that includes your
# modifications.
#
# CONFIG_ARCH_LEDS is not set
# CONFIG_NSH_ARGCAT is not set
# CONFIG_NSH_CMDOPT_HEXDUMP is not set
CONFIG_ARCH="xtensa"
CONFIG_ARCH_BOARD="esp32s3-eye"
CONFIG_ARCH_BOARD_COMMON=y
CONFIG_ARCH_BOARD_ESP32S3_EYE=y
CONFIG_ARCH_CHIP="esp32s3"
CONFIG_ARCH_CHIP_ESP32S3=y
CONFIG_ARCH_CHIP_ESP32S3WROOM1N4=y
CONFIG_ARCH_INTERRUPTSTACK=2048
CONFIG_ARCH_STACKDUMP=y
CONFIG_ARCH_XTENSA=y
CONFIG_BOARD_LOOPSPERMSEC=16717
CONFIG_BUILTIN=y
CONFIG_DEBUG_FULLOPT=y
CONFIG_DEBUG_SYMBOLS=y
CONFIG_DEFAULT_TASK_STACKSIZE=4096
CONFIG_DEV_ZERO=y
CONFIG_DRIVERS_IEEE80211=y
CONFIG_DRIVERS_VIDEO=y
CONFIG_DRIVERS_WIRELESS=y
CONFIG_ESP32S3_EYE_LCD=y
CONFIG_ESP32S3_GPIO_IRQ=y
CONFIG_ESP32S3_RT_TIMER_TASK_STACK_SIZE=4096
CONFIG_ESP32S3_SPI2_CLKPIN=21
CONFIG_ESP32S3_SPI2_CSPIN=44
CONFIG_ESP32S3_SPI2_MISOPIN=1
CONFIG_ESP32S3_SPI2_MOSIPIN=47
CONFIG_ESP32S3_SPIRAM=y
CONFIG_ESP32S3_SPIRAM_MODE_OCT=y
CONFIG_ESP32S3_USBSERIAL=y
CONFIG_ESP32S3_WIFI=y
CONFIG_EXAMPLES_FB=y
CONFIG_EXAMPLES_LVGLDEMO=y
CONFIG_EXAMPLES_RANDOM=y
CONFIG_FS_PROCFS=y
CONFIG_GRAPHICS_LVGL=y
CONFIG_HAVE_CXXINITIALIZE=y
CONFIG_IDLETHREAD_STACKSIZE=3072
CONFIG_INIT_ENTRYPOINT="nsh_main"
CONFIG_INIT_STACKSIZE=3072
CONFIG_INTELHEX_BINARY=y
CONFIG_IOB_NBUFFERS=124
CONFIG_IOB_THROTTLE=24
CONFIG_LCD_FRAMEBUFFER=y
CONFIG_LCD_PORTRAIT=y
CONFIG_LCD_ST7789_BGR=y
CONFIG_LCD_ST7789_FREQUENCY=40000000
CONFIG_LCD_ST7789_YRES=240
CONFIG_LIBYUV=y
CONFIG_LINE_MAX=64
CONFIG_LV_FONT_MONTSERRAT_20=y
CONFIG_LV_NUTTX_LCD_DOUBLE_BUFFER=y
CONFIG_LV_USE_CLIB_MALLOC=y
CONFIG_LV_USE_CLIB_SPRINTF=y
CONFIG_LV_USE_CLIB_STRING=y
CONFIG_LV_USE_DEMO_WIDGETS=y
CONFIG_LV_USE_LOG=y
CONFIG_LV_USE_NUTTX=y
CONFIG_LV_USE_NUTTX_LCD=y
CONFIG_LV_USE_NUTTX_TOUCHSCREEN=y
CONFIG_MM_REGIONS=2
CONFIG_NAME_MAX=48
CONFIG_NETDB_BUFSIZE=512
CONFIG_NETDB_DNSCLIENT=y
CONFIG_NETDB_DNSCLIENT_RECV_TIMEOUT=2
CONFIG_NETDB_DNSCLIENT_RETRIES=8
CONFIG_NETDB_DNSSERVER_NOADDR=y
CONFIG_NETDEV_LATEINIT=y
CONFIG_NETDEV_MAX_IPv6_ADDR=4
CONFIG_NETDEV_MULTIPLE_IPv6=y
CONFIG_NETDEV_PHY_IOCTL=y
CONFIG_NETDEV_STATISTICS=y
CONFIG_NETDEV_WIRELESS_IOCTL=y
CONFIG_NETDOWN_NOTIFIER=y
CONFIG_NETLINK_ALLOC_CONNS=1
CONFIG_NETLINK_ROUTE=y
CONFIG_NETUTILS_CJSON=y
CONFIG_NETUTILS_DHCPC_RECV_TIMEOUT_MS=200
CONFIG_NETUTILS_DHCPC_RETRIES=20
CONFIG_NETUTILS_IPERF=y
CONFIG_NET_ALLOC_DEVIF_CALLBACKS=1
CONFIG_NET_ARPTAB_SIZE=48
CONFIG_NET_ARP_IPIN=y
CONFIG_NET_BROADCAST=y
CONFIG_NET_ETH_PKTSIZE=1514
CONFIG_NET_GUARDSIZE=4
CONFIG_NET_ICMP_ALLOC_CONNS=1
CONFIG_NET_ICMP_NPOLLWAITERS=2
CONFIG_NET_ICMP_SOCKET=y
CONFIG_NET_ICMPv6=y
CONFIG_NET_ICMPv6_ALLOC_CONNS=1
CONFIG_NET_ICMPv6_AUTOCONF=y
CONFIG_NET_ICMPv6_NEIGHBOR=y
CONFIG_NET_ICMPv6_SOCKET=y
CONFIG_NET_IPFRAG=y
CONFIG_NET_IPv6=y
CONFIG_NET_LOCAL=y
CONFIG_NET_LOCAL_SCM=y
CONFIG_NET_LOOPBACK=y
CONFIG_NET_NETLINK=y
CONFIG_NET_PKT=y
CONFIG_NET_SEND_BUFSIZE=16384
CONFIG_NET_STATISTICS=y
CONFIG_NET_TCP=y
CONFIG_NET_TCPBACKLOG=y
CONFIG_NET_TCP_ALLOC_CONNS=1
CONFIG_NET_TCP_DELAYED_ACK=y
CONFIG_NET_TCP_NWRBCHAINS=128
CONFIG_NET_TCP_RTO=1
CONFIG_NET_TCP_SELECTIVE_ACK=y
CONFIG_NET_TCP_WAIT_TIMEOUT=0
CONFIG_NET_TCP_WRITE_BUFFERS=y
CONFIG_NET_UDP=y
CONFIG_NET_UDP_ALLOC_CONNS=1
CONFIG_NET_UDP_NOTIFIER=y
CONFIG_NET_UDP_NWRBCHAINS=64
CONFIG_NET_UDP_WRITE_BUFFERS=y
CONFIG_NSH_ARCHINIT=y
CONFIG_NSH_BUILTIN_APPS=y
CONFIG_NSH_FILEIOSIZE=512
CONFIG_NSH_READLINE=y
CONFIG_POSIX_SPAWN_DEFAULT_STACKSIZE=2048
CONFIG_PREALLOC_TIMERS=4
CONFIG_PTHREAD_MUTEX_TYPES=y
CONFIG_RAM_SIZE=114688
CONFIG_RAM_START=0x20000000
CONFIG_RR_INTERVAL=200
CONFIG_SCHED_LPWORK=y
CONFIG_SCHED_WAITPID=y
CONFIG_SIG_DEFAULT=y
CONFIG_SMP=y
CONFIG_SMP_NCPUS=2
CONFIG_START_DAY=6
CONFIG_START_MONTH=12
CONFIG_START_YEAR=2011
CONFIG_SYSLOG_BUFFER=y
CONFIG_SYSTEM_DHCPC_RENEW6=y
CONFIG_SYSTEM_DHCPC_RENEW=y
CONFIG_SYSTEM_NSH=y
CONFIG_SYSTEM_PING=y
CONFIG_SYSTEM_PING_STACKSIZE=3072
CONFIG_SYSTEM_TCPDUMP=y
CONFIG_TIMER=y
CONFIG_TLS_TASK_NELEM=4
CONFIG_UTILS_IPERF2=y
CONFIG_VIDEO=y
CONFIG_VIDEO_FB=y
CONFIG_WIRELESS=y
CONFIG_WIRELESS_WAPI=y
CONFIG_WIRELESS_WAPI_CMDTOOL=y
CONFIG_WIRELESS_WAPI_INITCONF=y
CONFIG_WIRELESS_WAPI_STACKSIZE=8192