
Introduction
Bandx is a smart band demo that incorporates watch dial, launcher, music, heart rate, stopwatch, sleep, sports, settings and flashlight, with a resolution of 194 x 368 pixels.Details about bandx are available in the “apps/packages/demos/bandx/” directory.
This article describes how to run this example on Emulator.
Prerequisites
To download the source code, see Quick Start.
Step 1: Configure the project
-
Switch to the root directory of openvela repository and execute the following command to configure Bandx.
Note: The emulator configuration file (defconfig) is in the “vendor/openvela/boards/vela/configs/goldfish-armeabi-v7a-ap/” directory, and the emulator code is configured and compiled using “build.sh”.
./build.sh vendor/openvela/boards/vela/configs/goldfish-armeabi-v7a-ap menuconfig- build.sh: A script for compilation used to configure and compile openvela code.
- vendor/openvela/boards/vela/configs/goldfish-armeabi-v7a-ap: configuration path
- menuconfig: Open the menuconfig page to modify the configuration of the project code.
The following screen appears after execution:

-
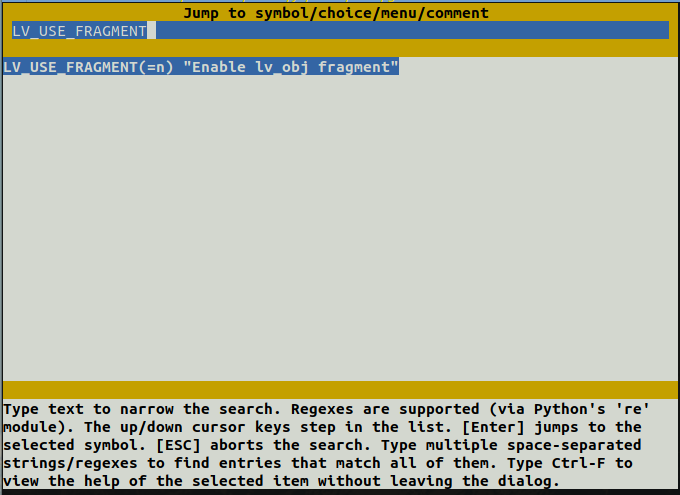
Press the “/” key to search and modify the following configurations:
LV_USE_FRAGMENT = y
LVX_USE_DEMO_BANDX = y
BANDX_BASE_PATH = "/data"
Take LV_USE_FRAGMENT as an example for illustration. The other configurations are modified is the same way.
-
Enter the configuration to be searched.
-
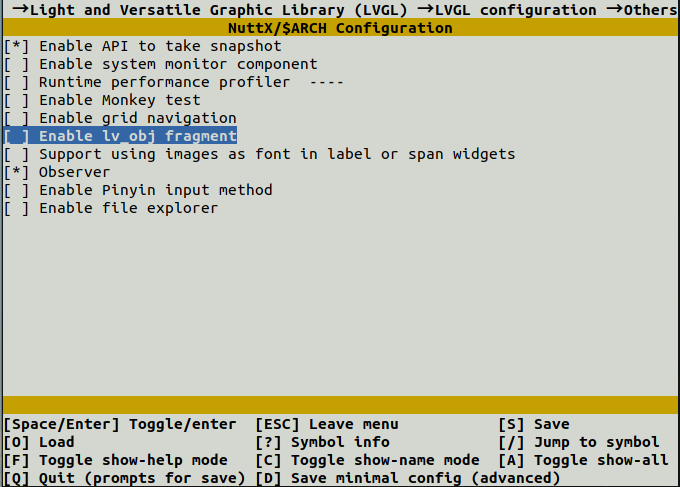
Press “Enter” to go to the configuration page.
-
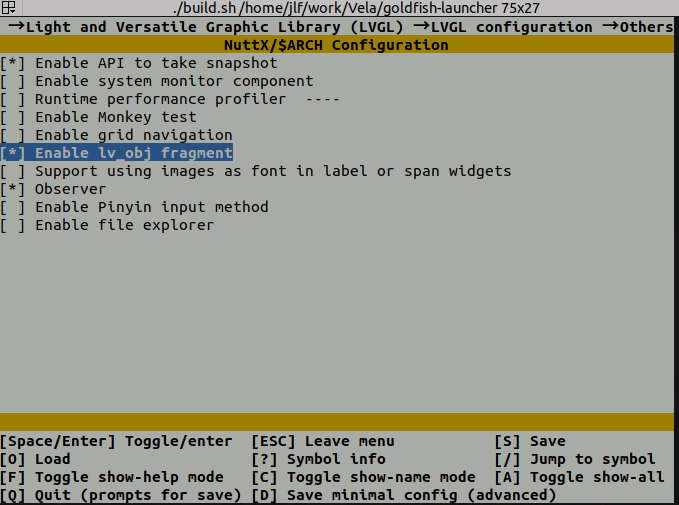
Press “Enter” to open the configuration, and a * that appears in [ ] indicates that the configuration is opened.
-
Press the “/” key to continue searching for the remaining configurations, and modify them as described above.
-
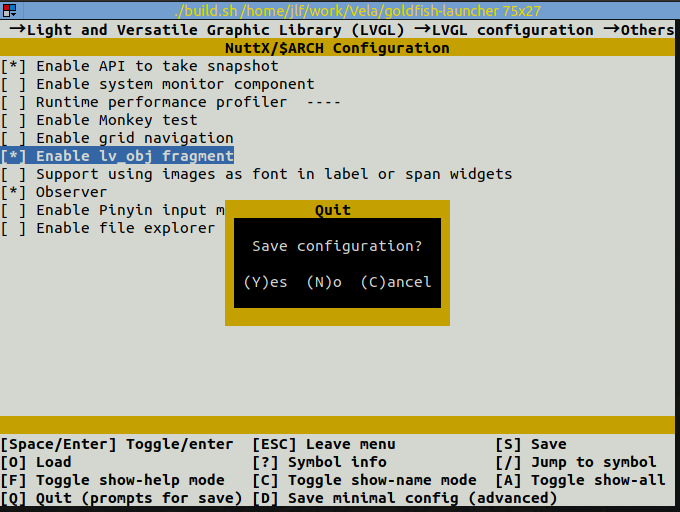
Press the letter Q to bring up the exit Save screen as follows.
-
Press the letter Y to save the configuration and exit the Modify Configuration page.
-
Step 2: Compile the project
-
Switch to the root directory of openvela repository and execute the following commands one by one in a terminal:
# Clean up build artifacts ./build.sh vendor/openvela/boards/vela/configs/goldfish-armeabi-v7a-ap distclean -j8 #Start to build ./build.sh vendor/openvela/boards/vela/configs/goldfish-armeabi-v7a-ap -j8 -
After successful execution, you will get the following files:
./nuttx
├── vela_ap.elf
├── vela_ap.bin
Step 3: Launch the emulator and push resources
The font and image resources used in Bandx are located in ‘apps/packages/demos/bandx/resources/’. To push these resources to the corresponding file paths mounted by the emulator, follow the steps below.
-
Switch to the root directory of openvela repository and start the emulator:
./emulator.sh vela -
Push resources to the device by using emulator-supported ADB. Open a new terminal in the root directory of openvela repository, type “adb push” followed by the file path to transfer the resources to the appropriate location.
# Install adb sudo apt install android-tools-adb # Push resources adb push apps/packages/demos/bandx/resource/font/assets/* /data/font/ adb push apps/packages/demos/bandx/resource/image/assets /data/image/Note: If “BANDX_BASE_PATH” is changed to a non-default value like “/tmp”, the resource files must also be moved to the “/tmp/font/” and “/tmp/image/” directories.Otherwise, a “resource not found” error will occur.
Step 4: Start Bandx
-
Enter the following command in the emulator's terminal environment “openvela-ap”:
bandx &
-
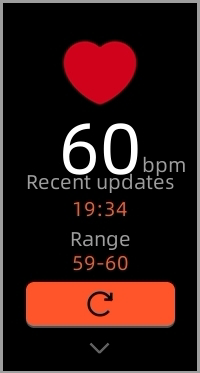
To access the Launcher screen, swipe quickly from right to left.Single-click different icons to navigate to subpages, such as the Heart Rate page shown below.To exit the page, swipe quickly from left to right.
Note: The music page is just a UI display, with no access to audio.
-
Turn on “Auto-show” in settings to auto-play the entire application. Turn off “Auto-show” to end playing it.
Step 5: Exit Demo
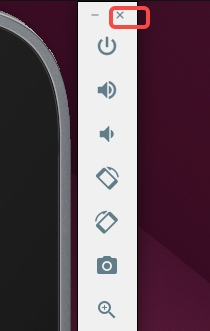
Shut down the emulator to exit Demo, as shown below:
FAQ
1. adb command not found
Reason
The "adb" tool is not installed.
Solution
Install “adb” and execute the following command:
sudo apt install android-tools-adb2. Garbled text is shown
Reason
Font resources are not loaded correctly.
Solution
Follow Step 3 to push resources.