
I. Overview
This guide instructs you on how to compile, build, deploy, and verify the operation of the openvela operating system on the Infineon TC4D9-EVB development board.
The TC4D9-EVB is based on the Infineon AURIX™ TC4x series microcontrollers (TC4D9/TC4Z9/TC489). It integrates rich interfaces such as multi-channel CAN-FD, LIN, Ethernet, and PCIe, making it suitable for the development and prototype verification of automotive electronics and high-performance embedded systems.
II. Expected Results
Upon completing the steps in this guide, the system will successfully start. You will be able to access the NSH (NuttShell) via a serial terminal (such as MobaXterm) for interaction, and perform multicore switching.
III. Prerequisites
This process involves two operating environments: a Linux Build Host for compiling the code, and a Windows Host for flashing tools.
1. Hardware Preparation
- Development Board: One TC4D9-EVB development board.
- Cables: Power cable and USB data cable (connected to the on-board debugger interface).
2. Build Host Preparation (Ubuntu)
- On your Ubuntu environment, please refer to the official document Quick Start (Ubuntu) to complete the openvela development environment setup and source code download.
- Open a terminal and execute the following commands to update the package list and install srecord.
sudo apt update
sudo apt install srecord
3. Flash Host Preparation (Windows)
The toolchain for flashing the TC4x series relies on the Windows environment. Please install the following software.
-
Install the TAS Tool (Tool Access Socket)
TAS (Tool Access Socket) is a middleware software suite released by Infineon. It provides a unified, abstract hardware access interface for host development tools and is a prerequisite for using the flashing tools.
- Link: Infineon TAS
- Verify Installation: After installation, connect the development board and power it on. Open the Windows Device Manager; if the Infineon DAS JDS COM device appears, the driver is successfully installed.
-
Install the AURIX™ Flasher Tool
This is a command-line tool used for erasing, programming, and verifying TC4x series chips.
- Download Link: AURIX™ Flasher Software Tool
- Verify Installation: It is installed by default in the C:\Infineon\AURIXFlasherSoftwareTool-3.0.14 directory. Enter this directory to verify the installation
-
Install the MobaXterm Serial Terminal
Used for serial communication with the development board. Download link: MobaXterm_Portable。
4. Configure Serial Connection
- Connect the development board to the computer via USB.
- Open the MobaXterm software and click Session.
- Select Serial to establish a Serial session.
- Port: Select the corresponding Infineon DAS JDS COM port.
- Speed (bps): Set to 115200.
- Click Advanced Serial settings and set Flow control to None.
- Click OK to open the connection.
IV. System Build (Ubuntu)
The TC4x architecture contains multiple cores, requiring the separate compilation of the Bootloader (BL) and firmware for 6 cores.
1. Execute Compilation
Enter the openvela source code root directory and execute the following sequence of commands:
# 1. Compile Bootloader
./build.sh vendor/infineon/boards/aurix/tc4d9_evb/configs/bl --cmake -j16

# 2. Compile firmware for each core (Core0 - Core5)
./build.sh vendor/infineon/boards/aurix/tc4d9_evb/configs/core0 --cmake -j16
./build.sh vendor/infineon/boards/aurix/tc4d9_evb/configs/core1 --cmake -j16
./build.sh vendor/infineon/boards/aurix/tc4d9_evb/configs/core2 --cmake -j16
./build.sh vendor/infineon/boards/aurix/tc4d9_evb/configs/core3 --cmake -j16
./build.sh vendor/infineon/boards/aurix/tc4d9_evb/configs/core4 --cmake -j16
./build.sh vendor/infineon/boards/aurix/tc4d9_evb/configs/core5 --cmake -j16
2. Verify Build Artifacts
After compilation is complete, please collect the following 7 .hex files from the cmake_out/ directory:
- cmake_out/infineon_tc4d9_evb_bl/vela_bl.hex
- cmake_out/infineon_tc4d9_evb_core0/vela_core0.hex
- ... to ...
- cmake_out/infineon_tc4d9_evb_core5/vela_core5.hex
V. Firmware Deployment (Windows)
1. Transfer Firmware
Copy the 7 .hex files mentioned above from the Ubuntu host to the same directory on the Windows host (e.g., D:\firmware\ or the AURIXFlasher installation directory).
2. Execute Flashing
- Ensure the development board is powered on and connected via USB.
- Enter the AURIXFlasher installation directory (default is C:\Infineon\AURIXFlasherSoftwareTool-3.0.14), then right-click and select "Open in Terminal".
-
Execute the following commands to flash (assuming the hex files are located in the current directory):
Important Note: You must flash all 7 firmware files (BL + 6 Cores). Missing the firmware for any core may cause the system to fail to boot properly.
:: Flash Bootloader
./AURIXFlasher.exe -hex vela_bl.hex


:: Flash Core0 - Core5
./AURIXFlasher.exe -hex vela_core0.hex
./AURIXFlasher.exe -hex vela_core1.hex
./AURIXFlasher.exe -hex vela_core2.hex
./AURIXFlasher.exe -hex vela_core3.hex
./AURIXFlasher.exe -hex vela_core4.hex
./AURIXFlasher.exe -hex vela_core5.hex
VI. Execution and Verification
1. Start the System
After all firmware is flashed, the system will automatically reset and start.
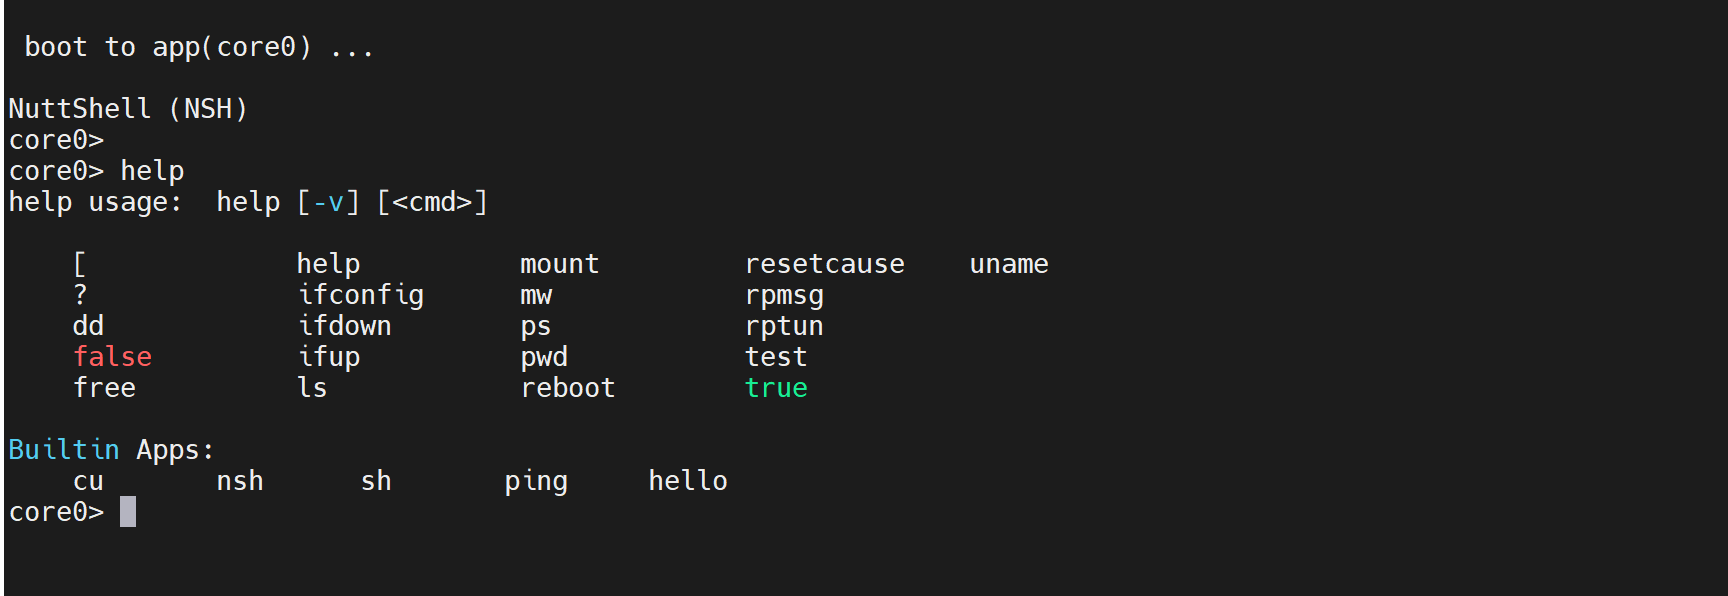
2. Serial Interaction
Return to the MobaXterm serial window. You will see startup logs, and the system will eventually stay at the core0> prompt, indicating that Core0 is ready.

3. Multicore Switching Verification
openvela supports connecting to the virtual terminals of other cores via the cu (Call Utility) command within NSH.
- Switch Command: Execute cu -l /dev/ttyCOREx in core0 (where x represents the core number).
- Exit Command: Press Ctrl + C to return to Core0.
Example: Switch to Core2
Enter the command:
cu -l /dev/ttyCORE2The terminal prompt will change to core2>, as shown below:
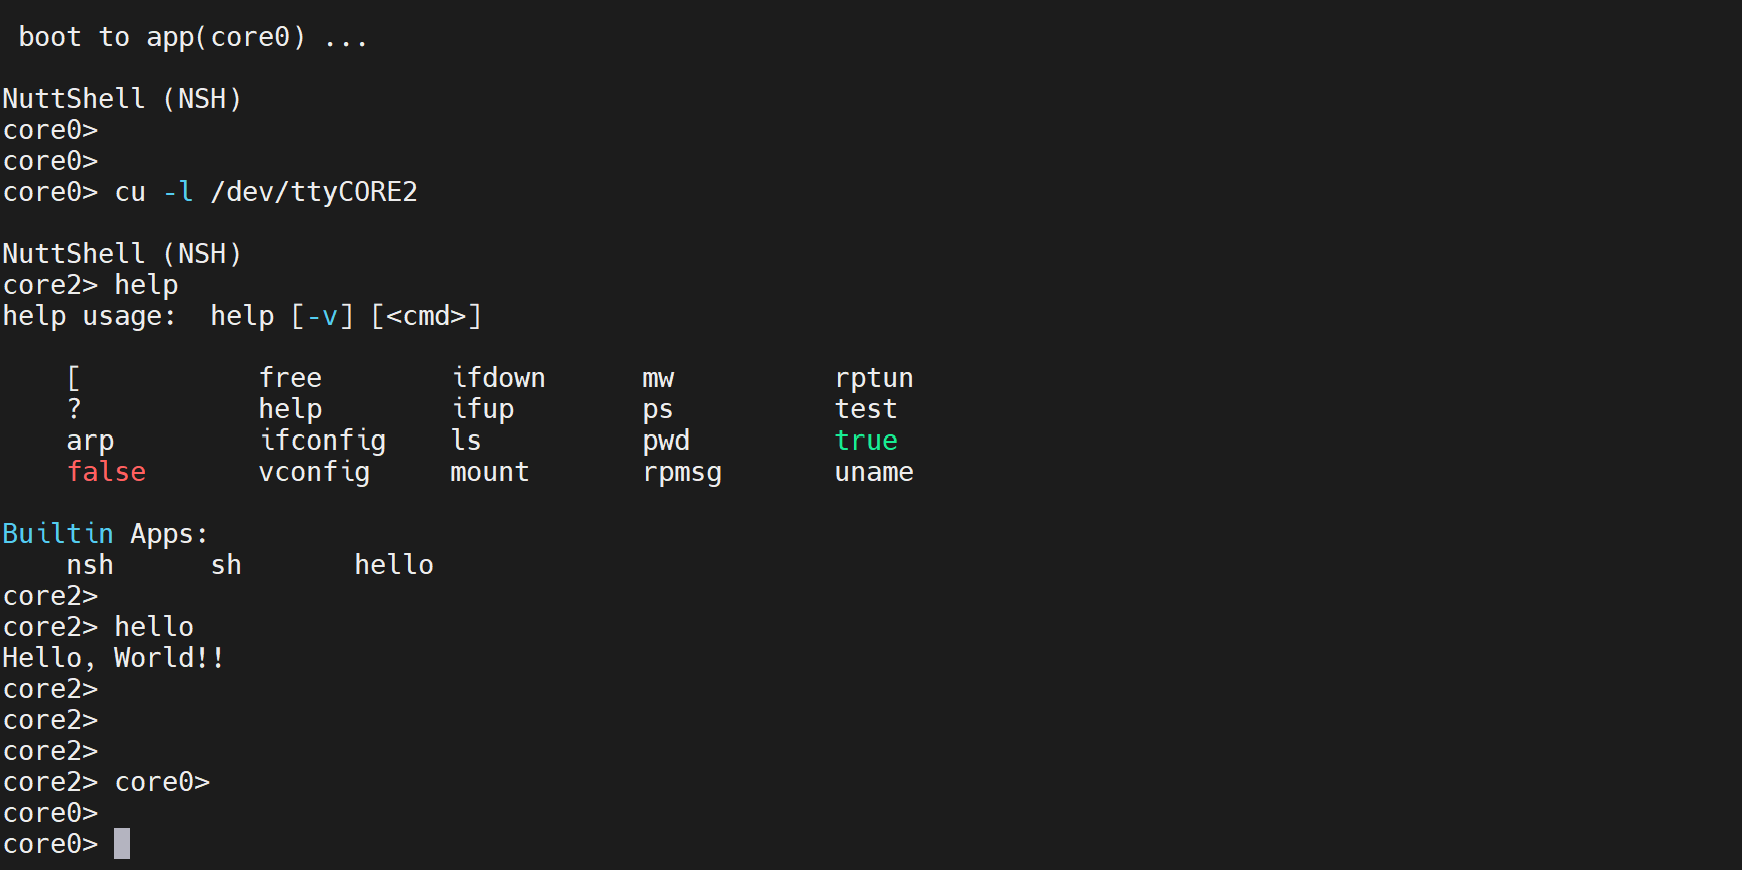
Use the Ctrl + C command to return to core0.